
Sections in this post:
What is geo-blocking and why should you care?
What countries should be blocked?
How to block traffic to identified countries
How to allow specific sites from blocked countries
What is geo-blocking and why should you care?
If you already know, feel free to skip to the next section. In the world of IT, geo-blocking is the practice of blocking network services based on the geographic region. This practice is most commonly used when configuring firewall rules to prevent users from accessing web services from foreign countries, specifically those with higher than normal known bad actors. This may be a company requirement to comply with specific standards, or maybe you don’t want your kids to access certain “free game sites” that download viruses and malware. (Definitely not speaking from experience). Below is some general guidance to get you started in the right direction, but I highly recommend looking for your company’s requirements and compliance standards for an accurate expectation.
What countries should we be geo-blocking?
Choosing what countries for geo-blocking really comes down to company policy / standards or, in the case of a lab / home use, personal preference. Our goal is to block countries with the highest number of malicious attacks, then allow traffic to specific IPs or web pages (if required) from those countries. In my professional experience, the list below contains 10 of the most frequently blocked countries that have the highest counts of malicious attacks:
- Brazil
- China
- Cuba
- Iran
- Nigeria
- Romania
- Russia
- Sudan
- Syria
- Ukraine
Please note that this list is simply in alphabetical order and is not a complete list. While this is a good place to start, check your company policy / standards to see if specific countries need to be blocked. It is also a good idea to check your logs to see if bad actors from other countries are attempting to access your network.
How to block traffic to identified countries
Blocking traffic originating from the inside network
The primary concern for most companies would be geo-blocking web traffic and other services to the countries defined above. Most modern firewalls have the capability to add addresses as geographic objects, but you can use a resource like IP2Location to find the IP ranges associated with each country. For this post, I’ll be using my FortiGate 60F. The process is relatively straightforward, we just need to create address objects for the websites or IPs, create an address group, then deny traffic to that address group.
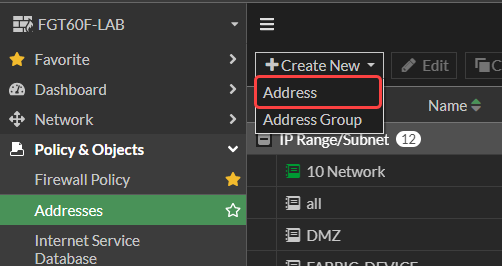
- First, we need to create address objects for each country on our list. Go to Policy & Objects > Addresses, click Create New and select Address.

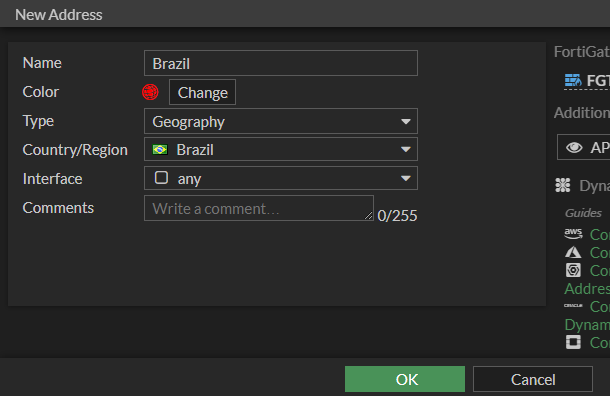
2. Enter the information as follows and click OK.
Name: Country’s name
Color: Preference, but I like to use red
Type: Geography
Country/Region: Country’s name
Interface: Leave default as “any”
3. Repeat step 2 for each country you want to block. Your geo-blocking list should should look like this:

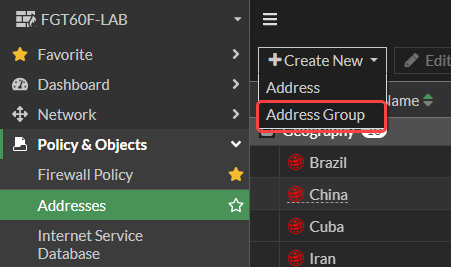
4. For ease of management, create an Address Group that contains the above address objects. Under Policy & Objects > Addresses, click Create New and select Address Group.
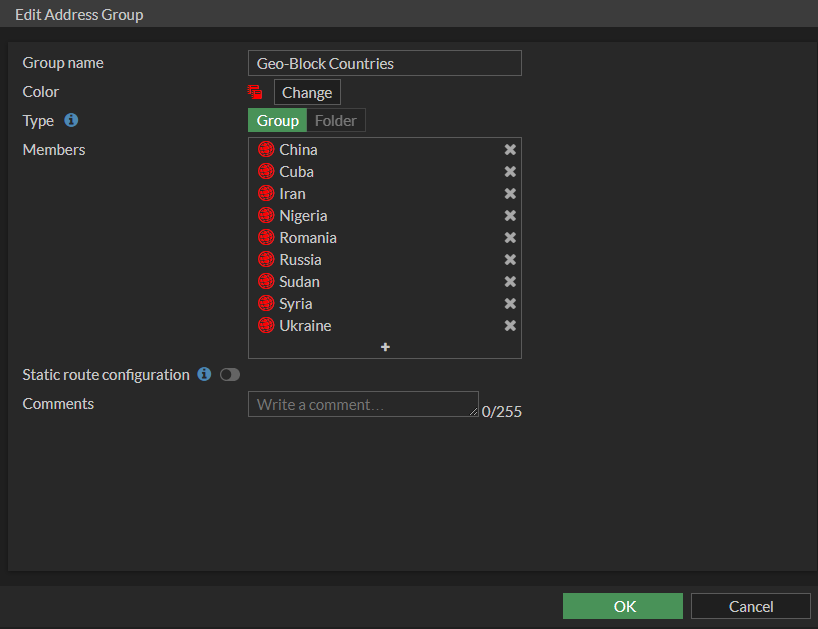
5. Enter the information as follows and click OK.
Name: Meaningful name (ex. Geo-Blocking Countries)
Color: Preference, but I like to use red
Type: Group
Members: Add the address objects you created in steps 2 and 3
Static route configuration: Leave default as disabled
6. Now that the group was created, go to Policy & Objects > Firewall Policy and click Create New.
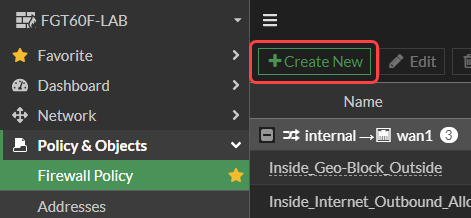
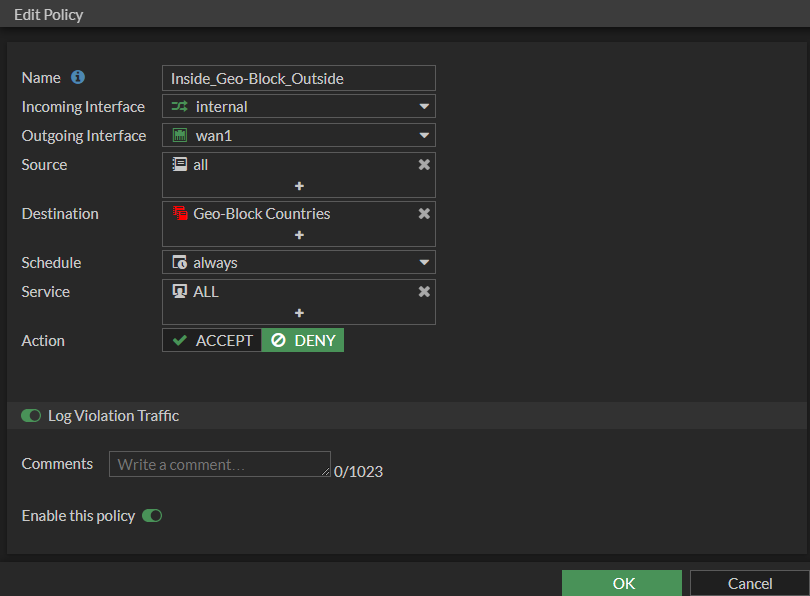
7. Fill out the fields as indicated below and click OK.
Name: Meaningful name that fits your naming convention
Incoming Interface: internal (or appropriate name for internal interface)
Outgoing Interface: wan1 (or appropriate name for wan interface)
Source: all
Destination: Name of Address Group created in step 5
Schedule: always
Service: all
Action: DENY
Enable this policy: Enabled
You can optionally enable Log Violation Traffic if you want to see who or which application is attempting to reach those sites.
8. The last step is to make sure the Policy is at the top of your policy list. FortiGate, as well as most modern firewalls, use a top-down policy structure where the policies at the are matched first.
Blocking traffic originating from the outside
It is highly recommended that you keep your default Implicit Deny rule or create an Explicit Deny rule to block any and all network services from any source and destination. In the event traffic does not match any of your defined rules, it will be blocked by the Implicit / Explicit Deny rule. Other than that, you should regularly review your defined firewall rules (once a month is a good start) to ensure there are no duplicate entries, that outdated firewall rules are removed, and there are no rules allowing traffic to unknown destinations. Not only will this tighten your security posture, but it will increase your firewall’s performance!
How to allow specific sites from blocked countries
In the event you have legitimate business with a company in one of the sites that have been blocked, we can add a policy that exclude the traffic for those specific sites and services from our geo-blocking. The process is similar to blocking, we just need to create address objects for the websites or IPs, create an address group, then allow traffic to that address group
1. Identify the address that you need to allow traffic to and the services required. For this example, I’m going to allow HTTP access to Russian operated yandxe.ru (taken from a list of popular Russian websites).
2. On your firewall (FortiGate again), go to your Policy & Objects > Addresses, click Create New and select Address.
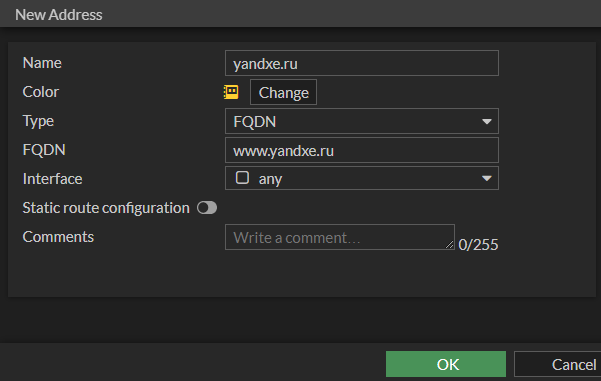
3. Enter the information as follows and click OK. I don’t generally advise using a wildcard for the entire domain, instead I will add each subdomain that is required for access.
Name: Website name or IP’s identifiable name
Color: Preference, but I like to use yellow
Type: Either FQDN or Subnet
FQDN / Subnet: FQDN or Subnet
Interface: Leave default as “any”
4. Repeat the process above for any additional subdomains that are required.
5. For ease of management, create an Address Group that contains the above address objects. Under Policy & Objects > Addresses, click Create New and select Address Group.
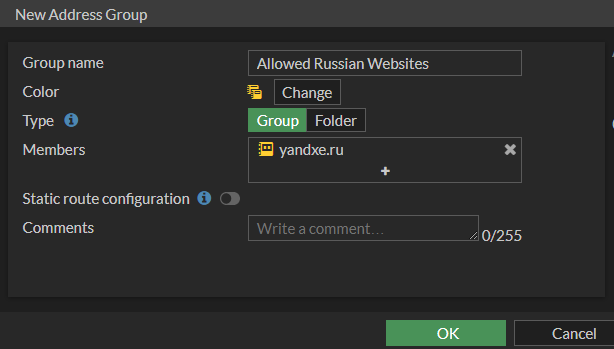
6. Enter the information as follows and click OK.
Name: Meaningful name (ex. Allowed Russian Websites)
Color: Preference, but I like to use Yellow
Type: Group
Members: Add the address objects you created in steps 2 and 3
Static route configuration: Leave default as disabled
7. Now that the group was created, go to Policy & Objects > Firewall Policy and click Create New.
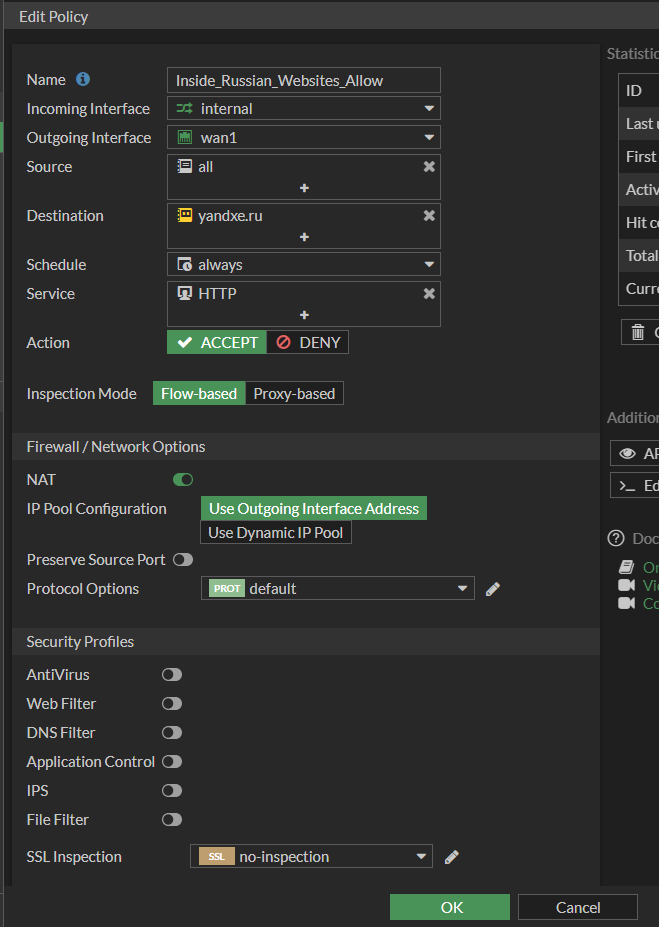
8. Fill out the fields as indicated below and click OK.
Name: Meaningful name that fits your naming convention
Incoming Interface: internal (or appropriate name for internal interface)
Outgoing Interface: wan1 (or appropriate name for wan interface)
Source: all
Destination: Name of Address Group created in step 6
Schedule: always
Service: Service to be allowed (HTTP in this case, but I strongly recommend only allowing HTTPS)
Action: ACCEPT
Enable this policy: Enabled
Log Allowed Traffic: I strongly recommend enabling to keep track of what computer / services are accessing this.
You will notice there are several options for Firewall / Network Options and Security Profiles, leave these as default for now. They are beyond the scope of this article, but those topics may be covered here in the future.
9. The last step is to make sure this policy is above your previously created geo-block policy. Once the rule is enabled and in the correct position, you can test it by navigating to that web page.
Conclusion
I hope that this article has helped clarify any questions in regards to what geo-blocking is, what countries should be blocked, how to implement it, and how to bypass it for legitimate traffic. The IT security landscape changes every day, sometimes hour to hour, so staying up-to-date on bad actors and always bolstering your security posture is imperative to keeping your organization safe. If you have a lab environment, always test new rules there first to make sure production services are not taken down. Remember: Break it till you make it!
Related articles
Technical Tip: How to block by country or geolocat… – Fortinet Community
I will geo-block countries except Ukraine South Korea Turkey Syria Antarctica.