
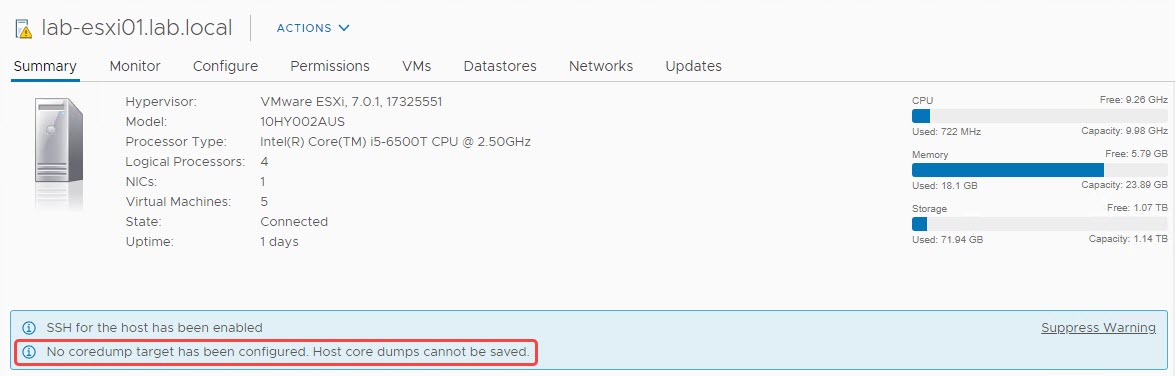
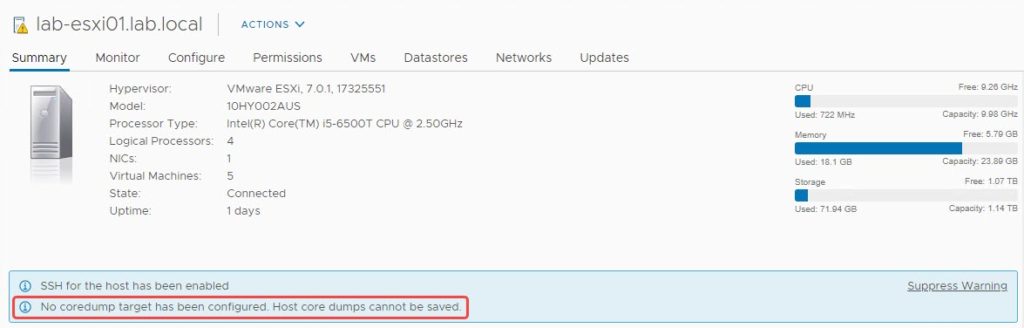
If you’ve ever installed VMware ESXi 7.0 on a smaller local disk, such as a USB drive or SD card, you may have noticed a new warning message about no coredump target being configured. Before we get into resolving this issue, we need to understand what it means and why we get it. You can skip to the resolution if you’re in a hurry, time is valuable!
What is a diagnostic coredump and why do I see no coredump target?
If you’ve ever seen a VMware Purple Screen of Death (PSOD), you know that it displays key diagnostic information that can aid in resolving the failure that the OS ran into. All of that diagnostic information is stored on the diagnostic coredump partition for easy access as of vSphere 7.0. This functionality is great, but why is this message showing up and why isn’t it configured by default? The answer is that this normally IS configured by default. VMware does NOT configure this by default you use USB drive / SD card as your boot drive. They have disabled coredump partitions on those devices, but luckily we can enable that option!
How to resolve “no coredump target”
There are two ways to get rid of this warning: permanently suppress warning or enable coredumps and manually create the partition. In a lab environment, diagnostic data is not as important and you can simply suppress it. I HIGHLY recommended to resolve this warning in a production environment. If you are like me and you set this up in a lab environment to emulate a production one, then the latter option is for you.
Permanently Suppress the warning
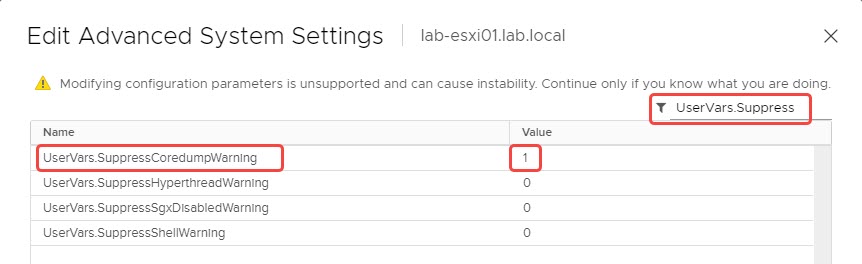
In order to suppress the warning, we’re going to need to set the Advanced System Setting UserVars.SuppressCoredumpWarning to a value of 1. There are two ways to do this, through the Embedded ESXi Host Client / vSphere UI in vCenter or from the command line via ESXCLI.
Note: If you have warnings about ESXi Shell or SSH being enabled, I recommend reading this article on how to disable them!
From the web UI:
- Go to the host with the warning, then navigate to Configure > System > Advanced System Settings.
- Click Edit on the top right.
- Filter by UserVars.Suppress and find UserVars.SuppressCoredumpWarning.
- Change the value from 0 to 1, then click OK
From the CLI:
- Either connect to the host via SSH or open the ESXi Shell.
- Run the command: esxcli system settings advanced set -o /UserVars/SuppressCoredumpWarning -i 1
After either method, the warning should disappear from the Summary tab
Enable coredump on USB and create the partition
IMPORTANT: Configuring a remote coredump file using an ESXi host software iSCSI adapter, software FCoE adapter, or to an NFS mount is not supported!
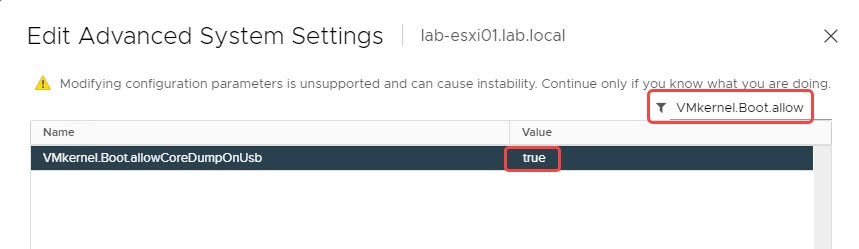
- From the web UI, go to the host with the warning, then navigate to Configure > System > Advanced System Settings.
- Click Edit on the top right, then filter by VMkernel.Boot.allow and find VMkernel.Boot.allowCoreDumpOnUsb.
- Change the value from false to true.
- Connect to the host via SSH and check for available local storage locations listed as Type VMFS-L using the following command esxcli storage filesystem list. See my output below:

- Now we need to create the coredump file. In the following command, be sure to replace DATASTORE with the value from step 5 and HostName with the name of your host (see screenshot):
esxcli system coredump file add -d DATASTORE -f HostName -s 2000
- To ensure the coredump file was created, I displayed the file information by running: esxcli system coredump file list. Afterwards, you will see an output similar to the screenshot below.

- You can see that when the file is created, the Active and Configured status are set to false. We need to set these values to true in order to enable them. To do this, run the command:
esxcli system coredump file set -s -e=True
- Lastly, run the command from step 7 again to verify Active and Configured are set to true.

When you return to the Summary tab for that host in the web UI, you should see that the warning has cleared!
If you want to read more about this issue, check out the VMware KB article: https://kb.vmware.com/s/article/2004299
This is perfect, thank you! Better instructions than other articles.
Thank you, great post!
Thank you for sharing!
Very well explained, and worked perfectly!
Perfect.
Simple and worked like a charm, unlike the generally overly-convoluted docs we get from VMware themselves.
Much appreciated.
Great info here, exactly what I needed – thank you, sir!!